PDFs with Fillable Forms
Note: Instead of making a fillable form as a PDF, consider using Microsoft Forms instead. It's a more accessible option in many ways, including not requiring the user to download a file, allowing the user to easily complete the form on a mobile device, and using HTML instead of the inherently less accessible PDF format.
While digital publishing programs like Adobe InDesign can export a reasonably accessible PDF document, that PDF is usually not actually usable by people with disabilities. PDF documents need tagged content to be perceivable to assistive technologies, but relying on tags and reading order to be created in an automated process will not offer a fully usable solution. It’s necessary for a human to test the document and make sure it works with assistive technology. This guide is assuming that the PDF has already been created and exported to a PDF, and that the design of the document itself is already accessible – for example, there is sufficient color contrast between the text and the background of the document. The design and color palette of a document needs to be edited in the original program and not in Adobe Acrobat.
Fillable forms are just one type of PDF document that needs to be fully accessible. Users can interact with the form using a mouse, keyboard, voice recognition software, assistive technologies like screen readers and Braille displays, and many other types of input. Getting the basics right and making sure a form is properly tagged and the reading order is correct can go a long way to making it as accessible as possible.
It’s sometimes a good idea to use the Accessibility Tool’s Autotag Document option as the first step to making a PDF more accessible. Unless you’re confident that it was exported from InDesign with all tags intact and accurate, the Autotag Document tool might make for a better starting point. However, running the Autotag Document tool sometimes causes the PDF’s layers to overlap one another, making some text difficult or impossible to read. If that happens, you’ll need to revert to the previous version of the file by going to the File option at the top of the program, followed by the Revert option. When that happens, you’ll need to manually change the tags that were exported from the original program.
If you have access to LinkedIn Learning, the video courses for Creating Accessible PDFs (external link) and Advanced Accessible PDFs (external link) cover almost everything you need to know about creating accessible Word documents, PowerPoint presentations, and PDFs, and is highly recommended.
Add Accessibility Tool to Acrobat
Adding the Accessibility Tool is helpful and makes it easier to access the tools that you might need. To do this, first go the Tools tab at the top of the Acrobat window. Then, under the Protect & Standardize heading on the Tools page, click on the Add button below the Accessibility icon. Finally, click the Add Shortcut option in the select box.

Adding Missing Tags
It’s common for the fillable fields to not have any tags when exported from InDesign.
Newly created tags will show underneath your previously selected tag in the left Tags panel. It’s a good idea to select an existing tag in that panel – for example, a <P>, <Art> or <Sect> tag – so you know where to find these newly added tags later in the process, when you need to drag them to the appropriate area.
To add tags to all these missing elements, first click the Tags icon in the left toolbar (its icon is a tag). Then, click on the Options icon and, finally, the “Find...” option in the popup window.
Whenever you are using the Tags panel, make sure to have the “Highlight Content” option turned on (a checkmark icon should show to the left of the option). This will make clear which tag you selected by highlighting the associated content in the document itself.

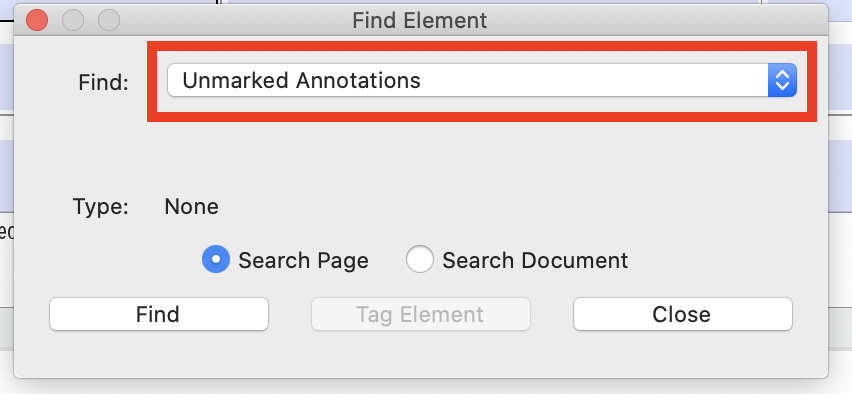
In the next popup window, choose “Unmarked Annotations” in the select menu and click the “Find” button. If any untagged form fields are present in the current page (or the whole document, depending on what option you chose), Acrobat will highlight the element and move the window’s focus to that element. Click the “Tag Element” button when it becomes enabled. Repeat this process until an alert appears that says “Find Completed”.
Manually Adding Tags
It is sometimes necessary to add tags manually - if, for example, multiple separate sections of text were exported from InDesign as a single tag.
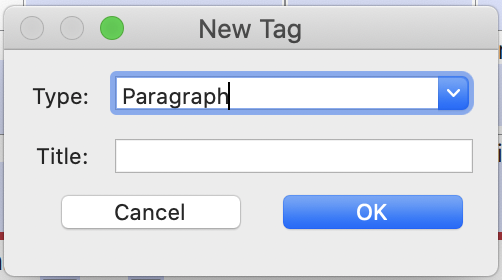
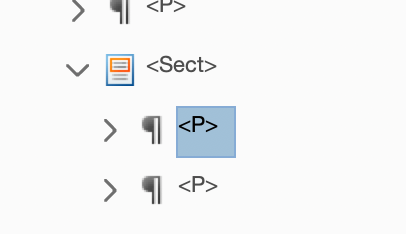
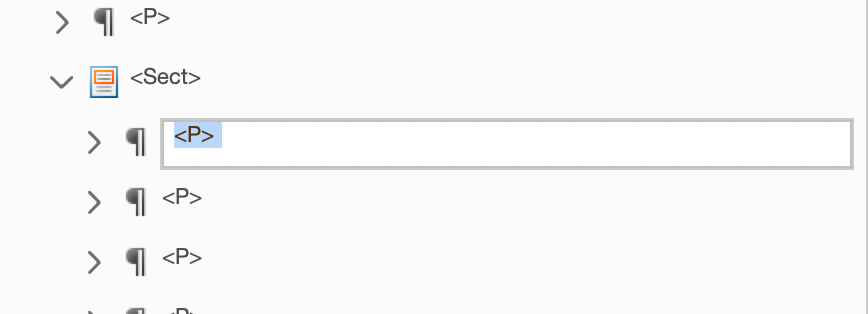
To manually tag elements in the PDF, first add the tag in the appropriate place in the Tags panel on the left side of Acrobat. The best way to do this is to find the existing tag that you would like the new tag to appear underneath. Right-click on the existing tag and choose the “New Tag...” option. A popup window will appear, where you can choose the type of tag you’d like to add. You can leave the Title field empty.
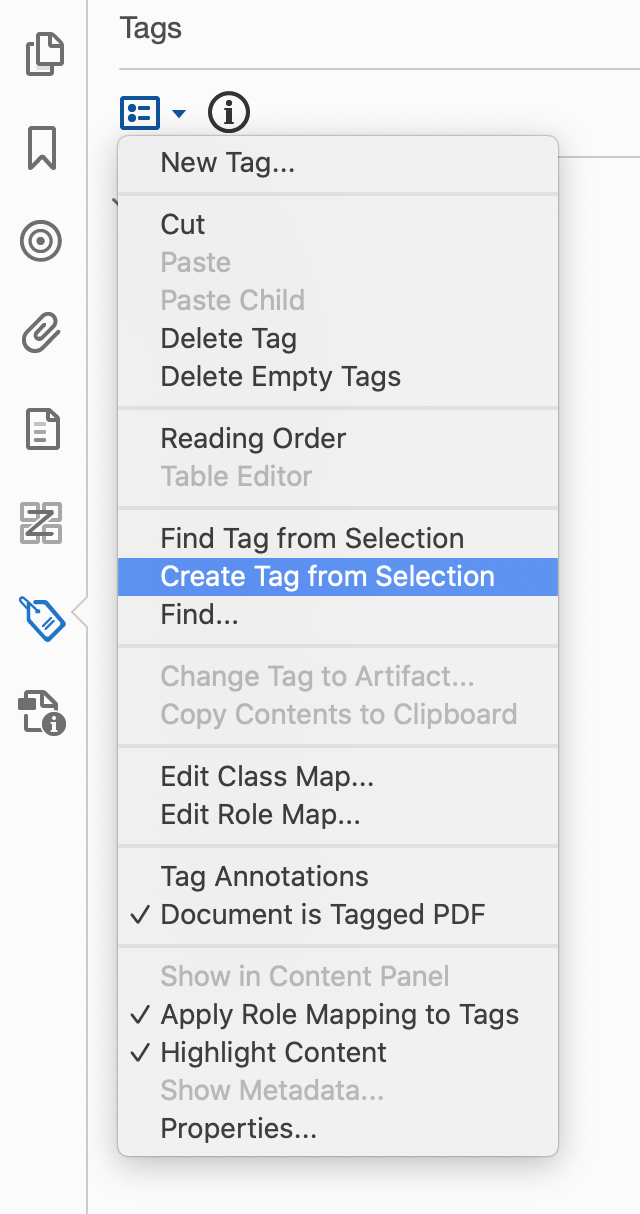
After the new empty tag has been added, left-click on that new tag. When the new tag is selected (it will be surrounded by a light blue square and a thin border) highlight the text in the document that you would like to place into this new tag. Then click the Options icon in the Tags panel and choose the “Create Tag from Selection” option in the popup menu. This will place the selected text into the newly created and selected tag.
Finding Existing Tags
It is also possible to find where content in the document exists in the tag structure. This is useful for quickly making sure that certain text is properly tagged.
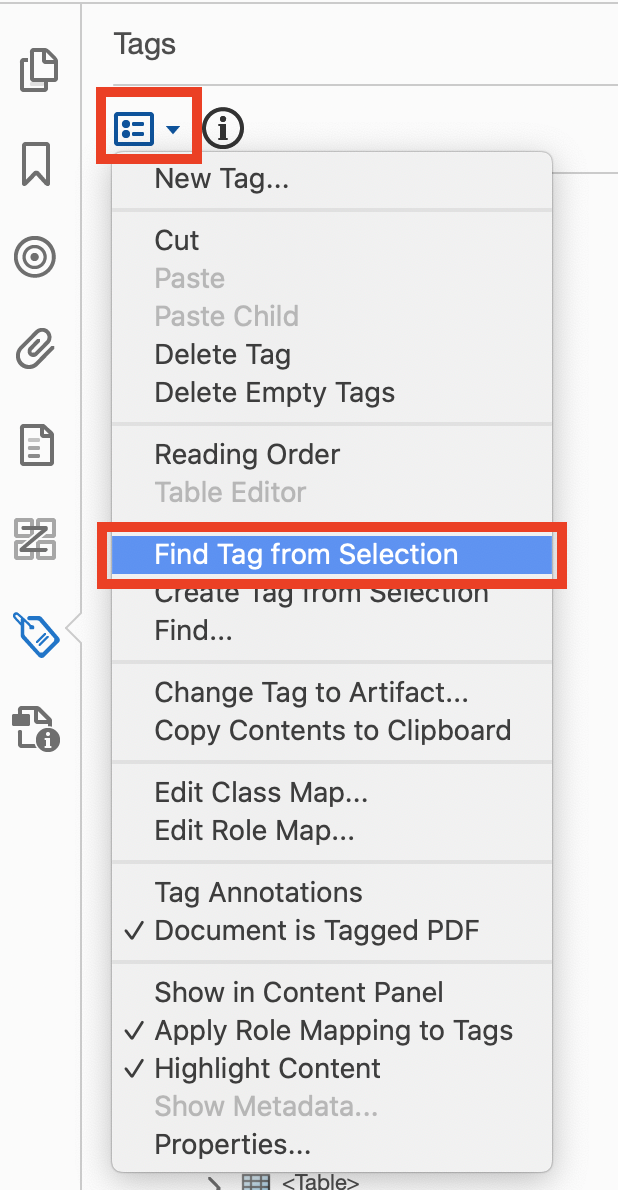
To do this, highlight the text you want to find. Then, click the Options icon in the Tags panel to the left of the Acrobat window and choose the “Find Tag from Selection” option. This will move focus to and open the tag containing the text you highlighted.
Changing a Tag's Type
If you accidentally add the wrong type of tag or want to change the type of a tag that already exists:
- Left-click on the tag you would like to change in the Tags panel
- When the tag you clicked on is inside a blue square, which indicates that it currently has focus, left-click on that tag again
- You can also right-click on the tag you'd like to change and click the "Properties..." option in the pop-up menu. You can then choose the correct tag from the Type select list.
- Enter the new tag type that you would like to use. You must always start with a less-than-sign
<to begin the tag, followed by the exact text for the tag type. You don’t need to type the more-than-sign>for the end of the tag – that will be inserted automatically after you enter the tag type and press the Enter key.
Common Tag Types
- Document (this tag is required and must always be the topmost tag in the structure, with all other tags nested below) -
<Document> - Paragraph -
<P> - Headings -
<H1>,<H2>,<H3> - List -
<L> - List item (must be nested inside a list tag) -
<LI> - List item label (must be nested inside a list item tag and usually contains the bullet or number of each list item) -
<Lbl> - List item body (must be nested inside a list item tag and usually contains the content of each list item) -
<LBody> - Table -
<Table> - Table row (must be nested inside a Table tag) -
<TR> - Table header cell (must be nested inside a table row tag) -
<TH> - Table data cell (must be nested inside a table row tag) -
<TD>
Rearranging Tags
Text Inputs
After all the missing form fields have been tagged, you can begin arranging those tags to match the visual order of the document. For example, a simple text field in a form usually has this order:
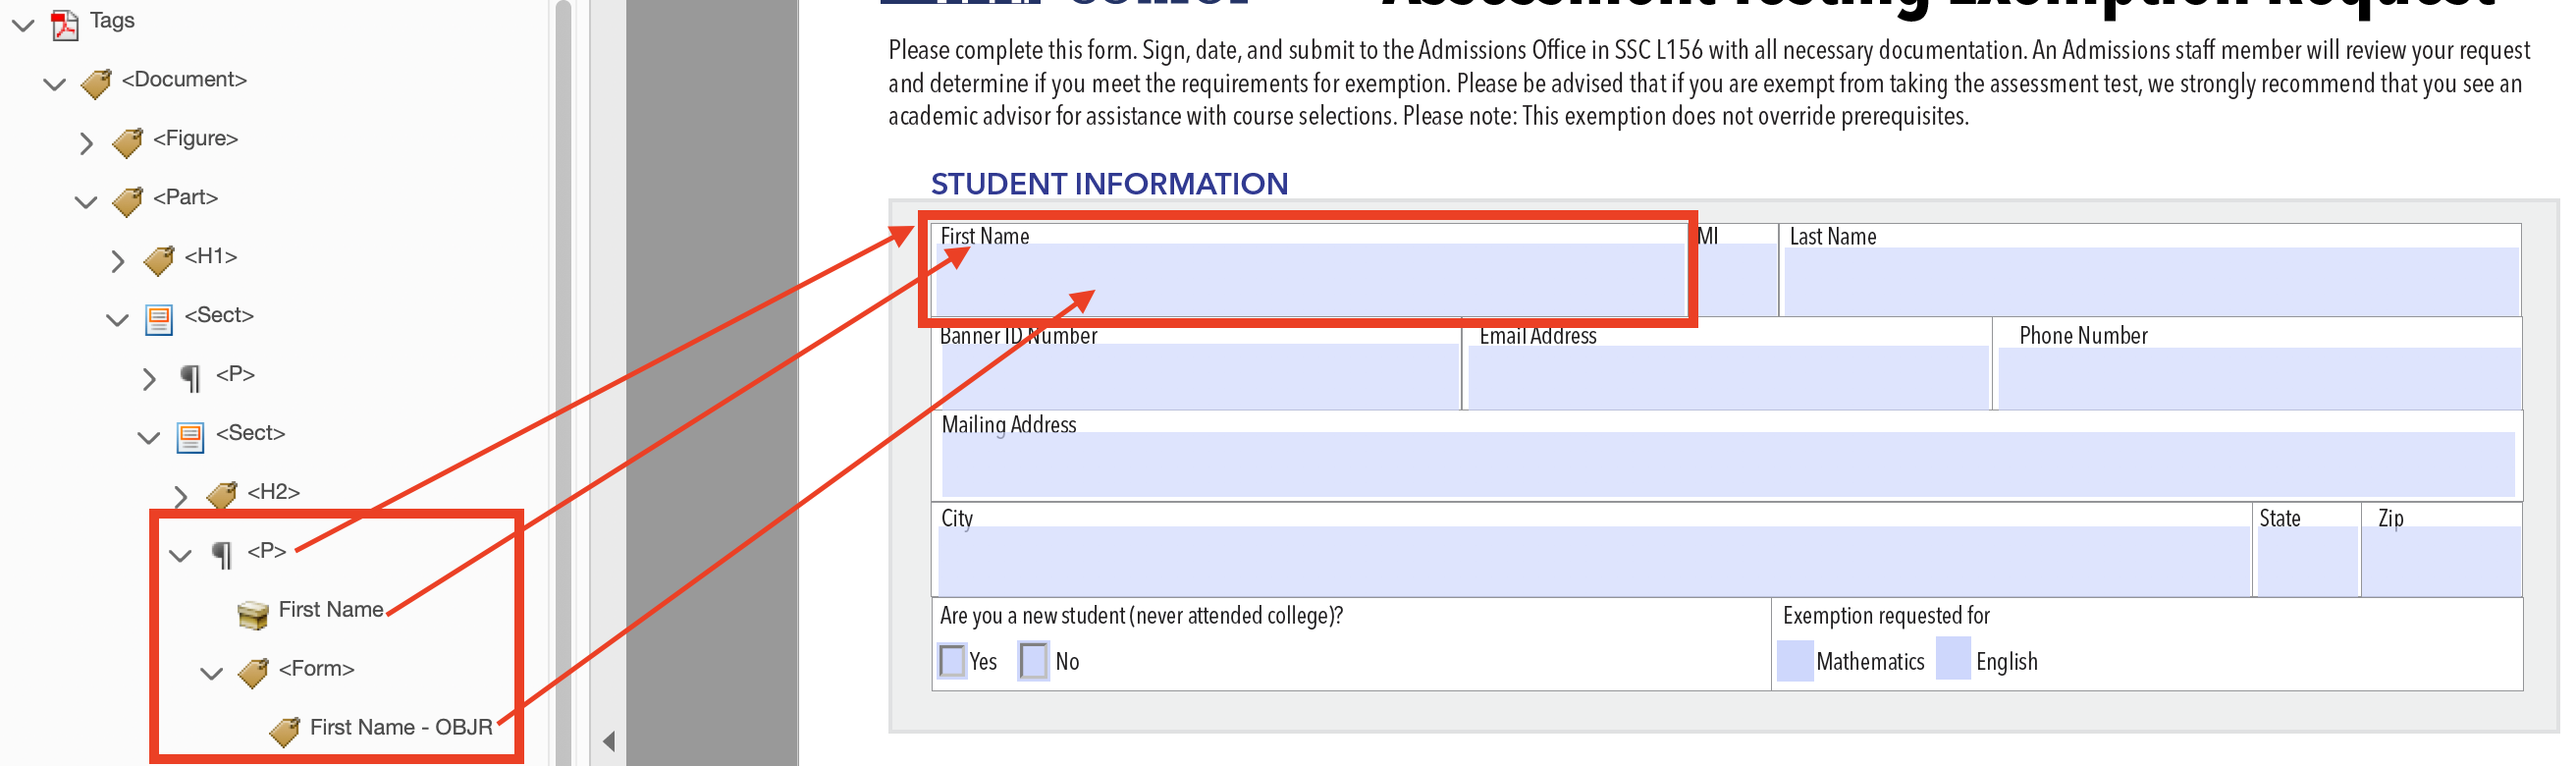
<P>- First Name
<Form>- First Name – OBJR
This structure has a paragraph tag as the top-level parent tag, wrapping the form field label and text input element. The text label for the input field (First Name) is directly below the paragraph tag, one level down. A form tag follows that text at the same level. Finally, the tag object for the actual text input element is nested inside the form tag. The screenshot below shows the connection between the tag structure and the visual appearance in Adobe Acrobat.
In general, whenever a form input tag (a tag with the letters “OBJR” after the tag’s name) is rearranged in the Tags panel, it belongs inside a <Form> tag.
Multiple Choice
Another common type of input in a form is multiple choice, such as a set of radio buttons or checkboxes. The tag structure is similar to a simple text input. All input elements and their associated text labels should be placed inside a <Form> tag, and their structure should match the visual appearance in the PDF.

Post-processing Settings
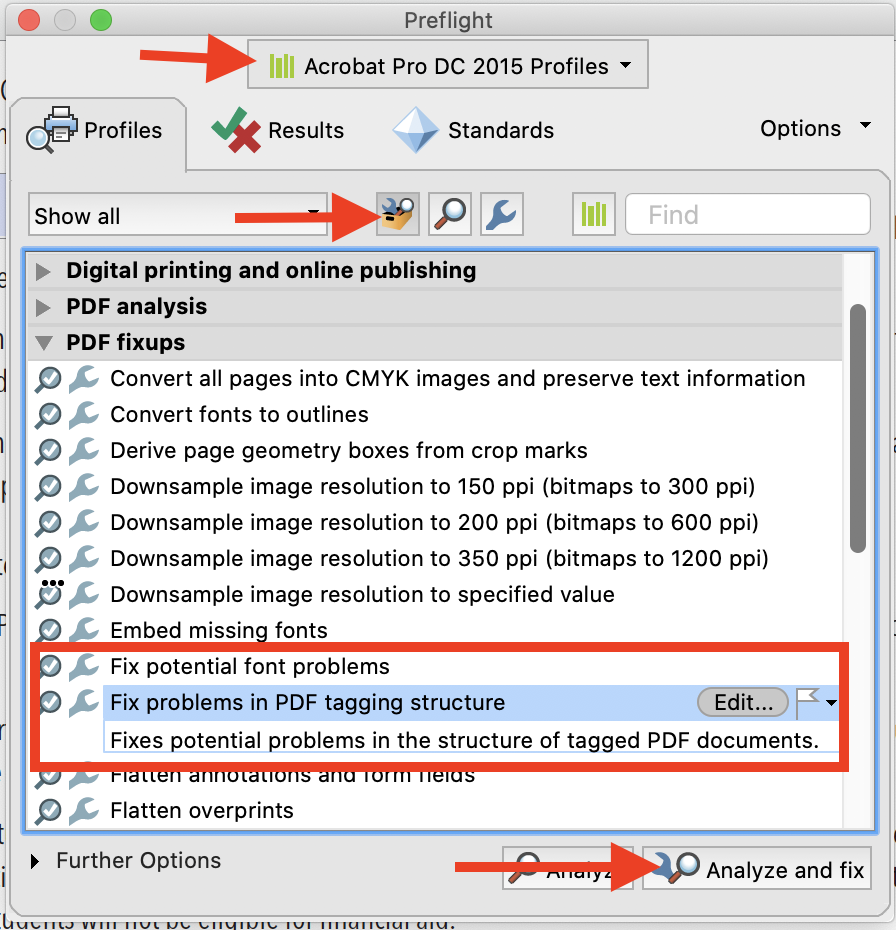
After all the manual tagging work is done, many problems that you might not be aware of can be solved by running Print Production Preflight tasks. These are automated tasks run in Acrobat Pro that will “detect and fix problems to obtain higher quality PDF documents”. The most useful task is Fix potential font problems and Fix problems in PDF tagging structure.
Note: When making these fixes, you’ll need to save the file again. You can simply replace the previous version of the file when asked to do this.