Kaltura
Video Demonstration
This document was developed for faculty in the Connecticut Community Colleges as a quick guide to accompany the short demonstration video available on YouTube, entitled: “Add Mechanical Fidelity Captions to Your Videos.”
To access this video, please visit this our Kaltura video playlist on Youtube.
Note: We strongly recommend that you watch the video first, so you can see a quick (six minute) overview of the entire process, which will provide some context for the navigation in My Media. Then the following step-by-step instructions will then walk you through the process.
Scenario
An instructor wishes to add automatically generated captions to a video that is available to their students in Blackboard, using the Kaltura media tool. He can either add captions to a video that has already been uploaded into his “My Media” area in Kaltura, or a new video can be added to “My Media” and have captions added to it.
How to Navigate to the Kaltura “My Media” repository from Blackboard’s My Institution page
Important: The only way to add or edit Mechanical Fidelity captions is by navigating to the “My Media” Kaltura repository from the My Institution page. You cannot add captions if you navigate to My Media from within a Blackboard course.
Although it is possible to view all My Media content by navigating to it from within a Blackboard course shell, you cannot add or edit mechanical fidelity captions that way.
- Log in and launch Blackboard.
- In the CT Community Colleges, users land on the “My Institution” page.
- Click on the “Kaltura My Media” subtab near the top left of the window.

- Click the “My Media” module link. This opens the “My Media” media repository for the user, where ALL of the videos that I have uploaded, for any course, are stored.
How to Upload a Video to Kaltura “My Media” Mechanical
If the video you wish to add captions to has not previously been uploaded into My Media, follow these steps. If it has already been uploaded into My Media (whether or not it has been linked to your courses), you can skip this step.
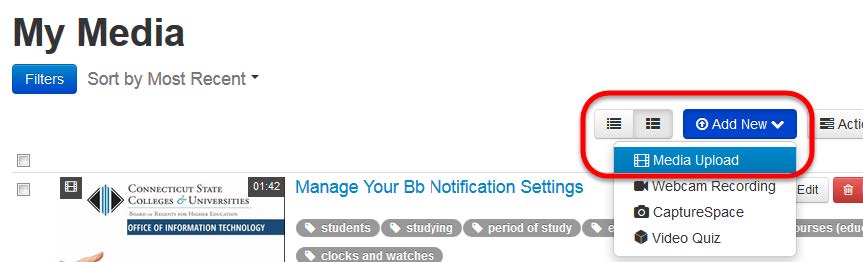
- Click “Add New.”
- Click “Media Upload.”
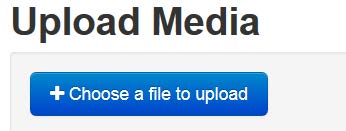
- Click “Choose a file to upload.”
- Navigate to the video file you want to add captions to, select it, and open it.
- Be sure the name you give the video matches the title referenced in your Syllabus or elsewhere in your course.
- Scroll down the page and click “Save.”
- Then click “Go to My Media” to return to the My Media tool.

How to Request Mechanical Fidelity Captions for a Video
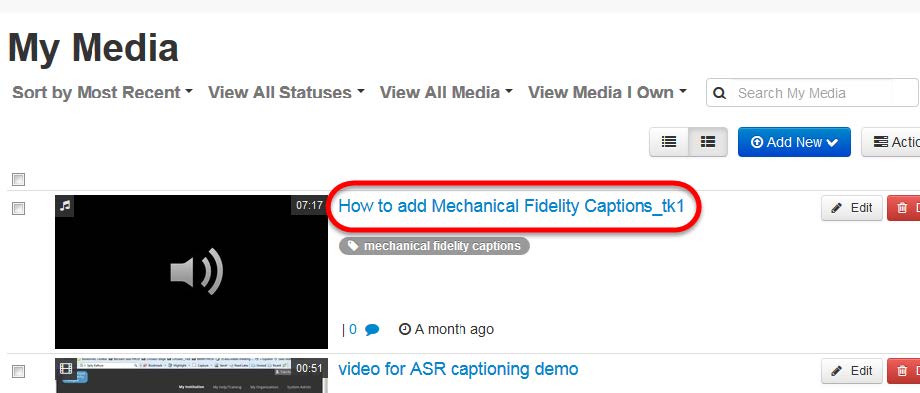
- When you go into the My Media tool, you will be looking at your list of videos. From the list of videos, click the blue title link of the video you want to add captions to.
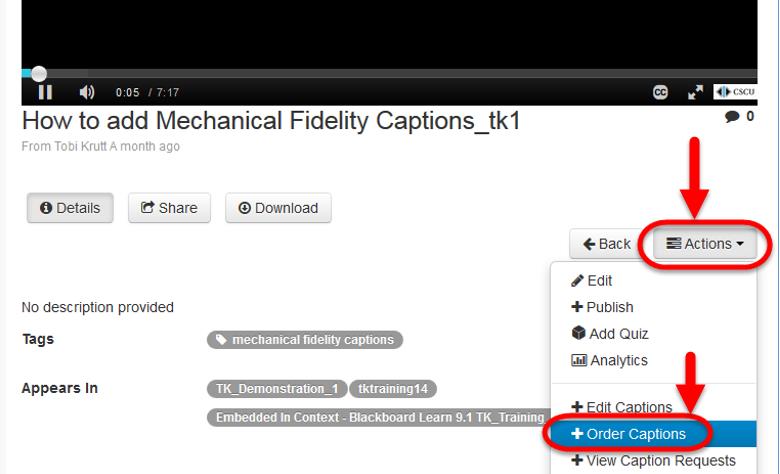
- Click the “Actions” button, and select “Order Captions.”
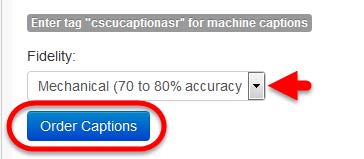
- The only option you will see here is “Mechanical (70 to 80% accuracy)”. Click “Order Captions.”
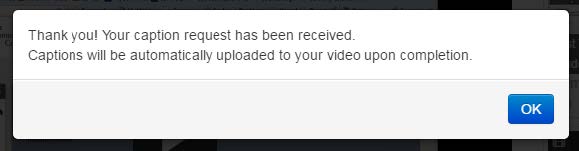
- A confirmation screen will display. Click “OK.”
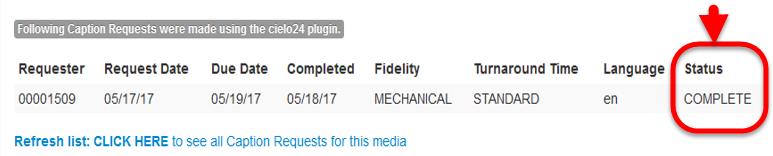
- You will see information about the caption order status. As the process is working, you will first see a Status saying it is Authorizing, then Processing, and eventually Complete.
Note: It can take some time for captions to process—depending upon the length of the video. So you may wish to leave “My Media” to do some other work. Then you can navigate back to “My Media” later to continue review and editing the captions once processing is complete.
How to Review and Edit Mechanical Fidelity Captions
If you left “My Media” to do other work, or left Blackboard completely, follow the steps in the “How to Navigate to the Kaltura “My Media” repository from Blackboard’s My Institution page” section of this document to navigate back to the My Media tool. (Remember - you MUST navigate to My Media from the My Institution page, not from within a Bb course!)
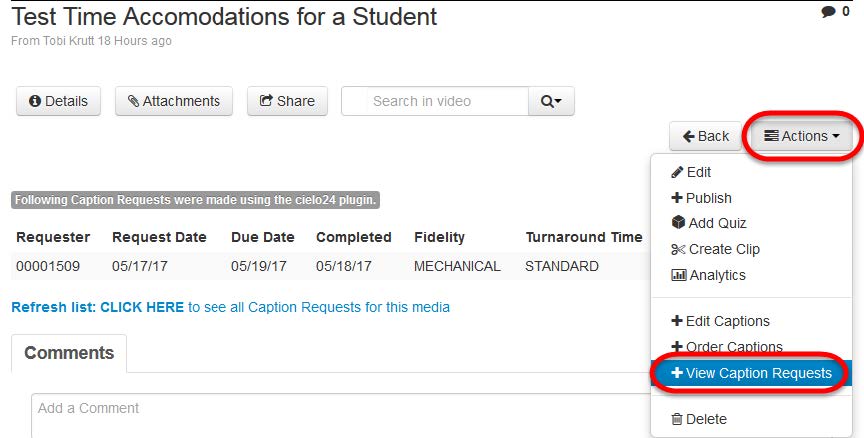
- From the My Media tool (where your videos are listed), click on the video title, then the “Actions” button. Select “View Caption Requests.”
- Assuming the Status is shown as COMPLETE, the next step is to Edit the captions.

- Please note that, depending upon your web browser and the local security settings on your computer, you may see a warning message or pop-up blocker message. You can approve these by clicking “Continue” or allowing the pop-up to display from the website.
- In the Editing window, you can make the changes to your captions. Note the Hotkeys and Sound Tag shortcuts shown in the panel at right, as this may be helpful in some videos.
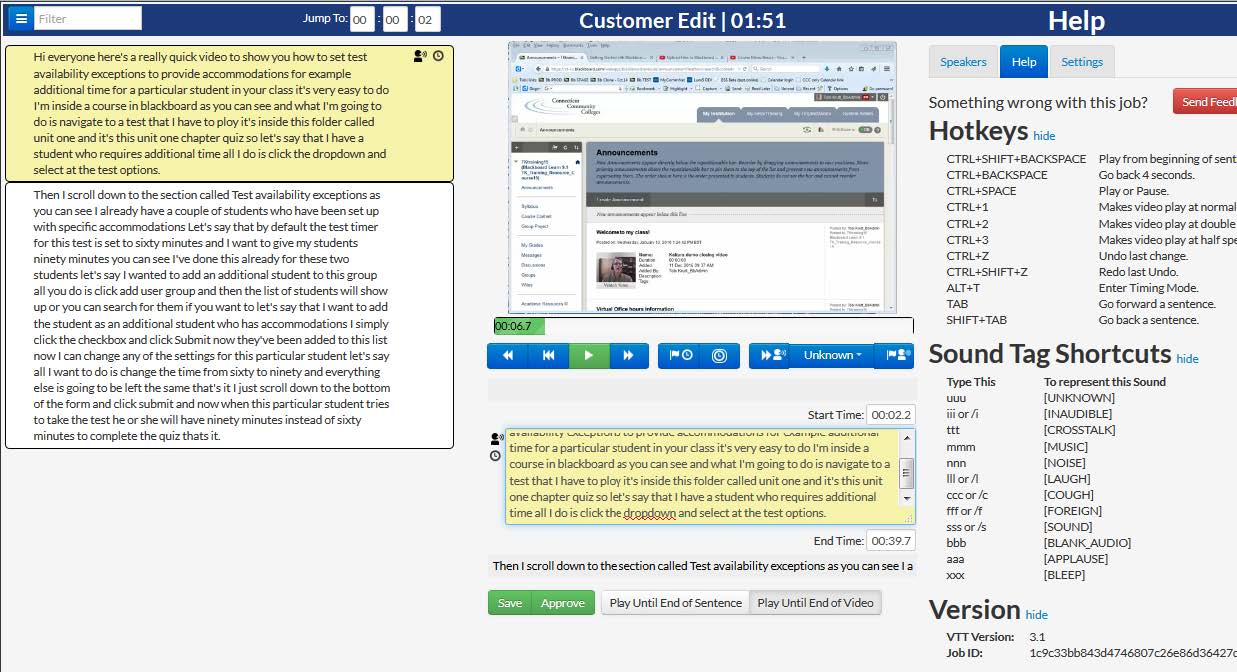
- Save and Approve buttons:
- Clicking Save saves the edits that have been done without updating the captions that display on the video.
- Click Approve when you are all done and wish to update the captions that display to viewers on the video.
- A dialog box displays showing the job was approved.
- Close the browser tab or window in which the Editor appears to return to the My Media tab or window so you can view your video with the captions displayed.
- If you need to do additional editing:
- In My Media, click the “Actions” button under the displayed video.
- Click “Caption Requests”
- Click “Edit”
- This will bring once again open the editing window in a new tab or window.
- If you need to do additional editing:
- If you have not already done so, you can now go into your Blackboard course shell and determine where in the course you wish to make the video available, for example, in the Media Gallery tool, or as Kaltura Media, or as a Mashup in an announcement, item, discussion, etc.
How Students Can Search for Terms in Captions
Students will have the ability to search for key words or phrases in your video’s automatically-generated captions if you have made the Kaltura “Media Gallery” available to students in your course.
- Add Media Gallery tool to the course menu
- Click “Add Menu button” + sign above menu
- Select “Add Tool Link”
- In the Name field type “Media Gallery” and from the Type dropdown select “Media Gallery.”
- Click “Available to Users” and Submit.
- Drag the new menu button from the bottom of the menu to the location where you want it to appear.
- Then add the video with the captions into the Media Gallery.
- Students simply click on the video they want to watch in the Media Gallery.
- If they wish to search for a word or phrase, they type it into the Search field and click the Search button.
- Links will appear below just below the search box with the matching text. A student clicks the link to go to the selected point in the video.